Showing posts with label Workout. Show all posts

The act of breathing is simplicity itself: Air flows into and is then expelled from the lungs. It's an automatic function of the body that keeps us alive and active. While the action of breathing is automatic most of the time, we do have control over how we do it and when we choose to exert that control. And, how we use that breath during physical activities can influence our performance in the gym.
That's mostly due to the diaphragm, the muscle that controls the act of breathing. The diaphragm is a dome-shaped muscle, located across the bottom of the thoracic cavity, which flattens as it contracts. This increases the volume inside the cavity, and pulls air in. When the diaphragm relaxes, the volume within the cavity decreases, and pushes the air out.

But your breathing changes in response to your circumstances as well, and often with very good reason. Ask yourself three questions:
•What did you do when you were huffing and puffing during your last rapid-fire workout? You likely sucked in bigger breaths to bring down your heart rate.
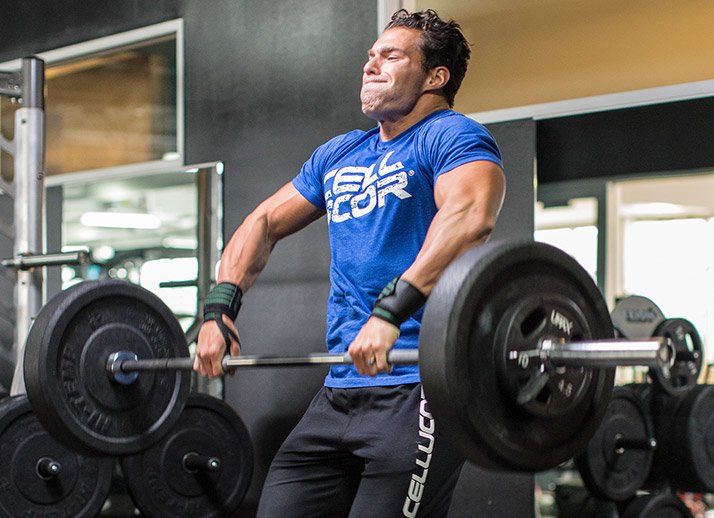
•How do you typically breathe when you struggle to eke out a final rep of your heaviest set? You probably hold your breath to help create more core tension during the lift.
•If you were in a fight and saw a punch to your gut coming, what would you do? You would brace for that punch by holding your breath and contracting your abdominals.
The upshot is that your body innately understands the function of breathing during physical activities and stress, and it adjusts accordingly. Learning to harness the natural power of breath means that we can improve lifts, stabilize the spine, and increase our recovery through the simple act of breathing.

Below are four drills to help you practice increasing your breath control as you learn to focus your mind, brace your spine, and wash away daily stress.

1. Anytime: Yogic Breathing

The type of breathing known in Sanskrit as "ujjayi" (ocean breath), is an active breathing pattern that is best practiced in a comfortable, seated position. It's very common in yoga classes, but it's also worth practicing at home, off the clock, and outside of the gym.
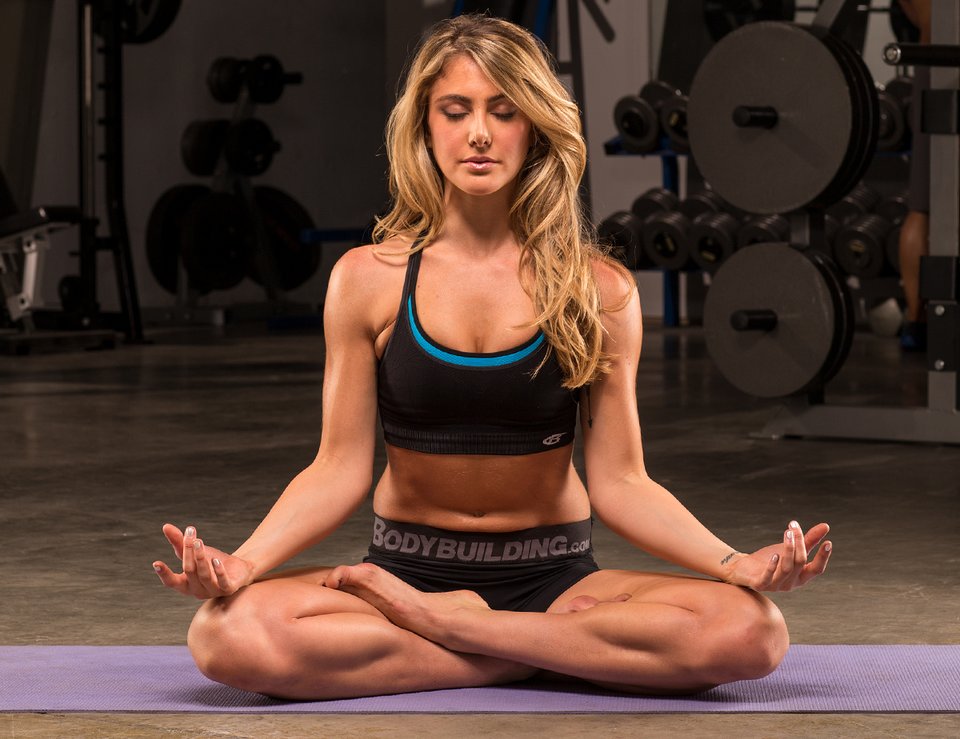
Before we learn to control our breath we have to feel it, and that's what ujjayi breathing teaches. It gives insight into how breathing works, and how you can develop the ability to slow it down or speed it up. When you learn to control it in this way, you'll be better able to use it as a tool in your training.

How To:

1.Sit up tall, with your chest wide and your shoulder relaxed.
2.Close your eyes and begin to breath in and out through your nose. Slow     the breath down and create a 4-count inhale and a 4-count exhale.
3.After you've established this rhythm, begin to constrict the back of your throat as you breathe. This will produce the slightly rumbling ocean sound that accompanies this breathing exercise.
4.Continue this for a total of 5 minutes, trying to maintain your focus, and maintain the breath.

2. Pre-Workout: Alternate-Nostril Breathing

This breathing exercise teaches you to bring your focus to each breath. It is a perfect pre-workout practice to help center your body and mind before you train.

How To:

1.Start in a comfortable seat, with your shoulders relaxed and your chest open.
2.Close your eyes, and begin to breath slowly in and out through your nose. Spend ten inhalation-exhalation cycles of breath before you move on to the next step.
3.Take your right thumb and use it to close your right nostril. Inhale slowly through your left nostril.
4.Close your left nostril with your right ring finger, and exhale through your right nostril.
5.With your right thumb, close your right nostril and inhale through the left. Then, close the left, and exhale through the right. Continue this way for up to 10 cycles of breath.

3. Intra-Workout: Brace-And-Hold Breathing

This exercise directly contributes to the strength and success of your lifts. Understanding how to pull your core muscles in toward your center to brace your spine, while still maintaining a rhythmic breath, means stronger, safer training.

How To:

1.Start standing, with your shoulders relaxed and your feet hip-width apart.
2.Draw a huge inhale through your nose, and hold your breath as you pull your ribs in and down, as if bracing for a punch in the stomach.
3.Hold this for a slow count of five, then exhale through your mouth, only releasing about 50 percent of the tension you created throughout your core.
4.Inhale deeply through your nose, hold complete tension for a slow count of five, then exhale through your mouth.
5.Cycle through four rounds of breathing in this fashion, then rest for 30 seconds.
6.After you've practiced this breathing pattern for three rounds, use it during your lifts. How? First, get set up to lift, take a big inhale through your nose, pull your belly and ribs in, execute the lift, then release the breath.

4. Post-Workout: Recovery Breathing

This final exercise seems simple in execution, but can be challenging to maintain. The ideal time to practice this is while you stretch, post-workout or at home. This exercise can be difficult because your mind will wander and your breath will change, while the goal is to stay relaxed, present, and consistent.

How To:


1.Breathe through your nose, slowly and mindfully, for at least 5 minutes. You don't have to be in a seated meditation-style posture while you do this, but if that's the only way you can concentrate, then do it. Otherwise, do it while you cool down, stretch, or even drive home from the gym.
Ultimate Shoulders Workout By Craig Capurso’s


Hang cleans, epic eccentrics, and Tabata-style reps make Craig Capurso's shoulder blast one you won't forget. Strap in, and prepare for a hard hour!


Ready for an unconventional take on shoulders? Capurso will have you sucking wind after your first exercise, before you move on to a challenging Olympic-lifting staple. Then, he takes intensity a step further with eccentric training and Tabata-inspired isolation work to hit you so hard you'll feel it for days to come
Capurso says his Ultimate Shoulder Workout will improve your power, strength, muscle size, and muscle endurance—all in a single 60-minute workout. "You hit it hard, then you're out. But just like with my Ultimate Back workout, this is going to be one very challenging hour.”

CRAIG'S TECHNIQUE KEYS

OVERHEAD KETTLEBELL SWING

Ready to do a few joint circles to warm up? Not exactly what Capurso has in mind for you today. How about a 4-minute round of CrossFit-style kettlebell swings instead? It'll get your blood circulating, pump up your heart rate, loosen up your joints—and make your muscles nice and pliable for the killer workout to come.

Do these kettlebell swings using both arms simultaneously. Select a load you can do for about 20 reps, then do the swings Tabata-style: alternate 20-second work segments with 10-second rest intervals until you finish the 4 minutes. Use a smooth and deliberate motion to help elongate the range of motion around joints, not to reach muscle fatigue.
Don't be a hero with weight selection, either. This is a warm-up, not a finisher!

BARBELL HANG CLEAN

Much like with his back day, Capurso puts the most challenging movement, the hang clean, right up front when your energy levels are highest and you can really load on the plates.

You may associate hang cleans with Olympic lifters or football players, but Capurso loves them for building "those bulging shoulders and traps." He also likes them because they aren't as difficult to learn as some Olympic-lifting movements.


He advises starting light. The third set is where things get serious. But because of their complex and explosive nature, you should definitely be proficient at hang-clean form before you load them heavily as part of a rep scheme like 5 sets of 5 reps.

Once you're comfortable with hang cleans, do the first two sets well short of muscle failure, with the final three sets coming very close to failure. The low-rep target helps you build strength and power, but as with any movement, if you start to lose form, end the set.

ECCENTRIC-FOCUSED LATERAL RAISE

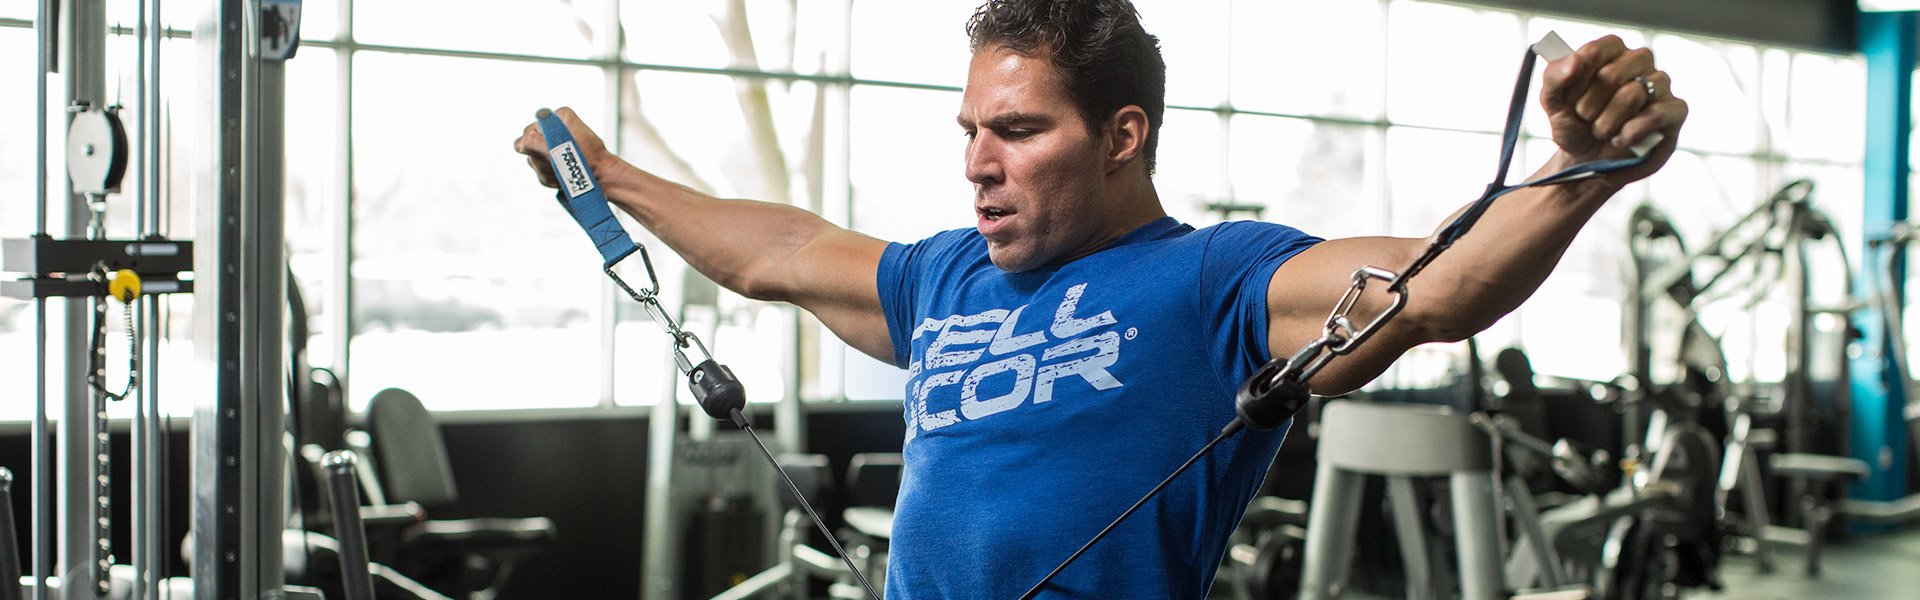
Now things really get fun. He selects the single-joint cable lateral raise, but then does the movement bilaterally, standing midway between the cable stacks. Oh, and his version includes an ultra-challenging 8-second negative.

Research suggests you can produce 20-60 percent more force on the negative rep, so that's what Capurso focuses on. He uses the increased time under tension during the negative portion to really work the middle delts—and does it for 10 reps. Adjust your working weight so that you reach muscle failure by the third set. These will be tough.

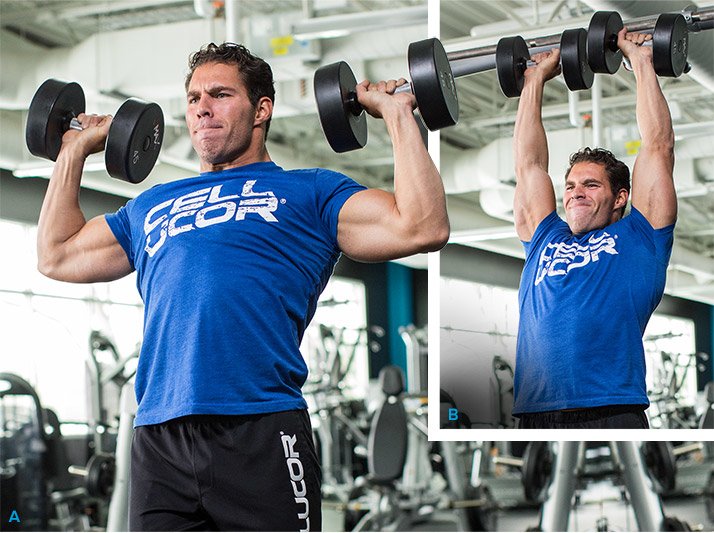
STANDING OVERHEAD DUMBBELL PRESS

Finally, Capurso adds a dedicated multijoint shoulder movement with the overhead press, which he does standing for a higher-rep target (15). The way he changes the relative intensity (from 5 reps to 10 to 15 in the first three exercises) allows you to stimulate your shoulders in a way that deepens the muscle pump and starts to focus on building muscle endurance.


When using the standing version, Capurso suggests you go a bit heavier than with the seated shoulder press. By the third set, you should be struggling to finish.

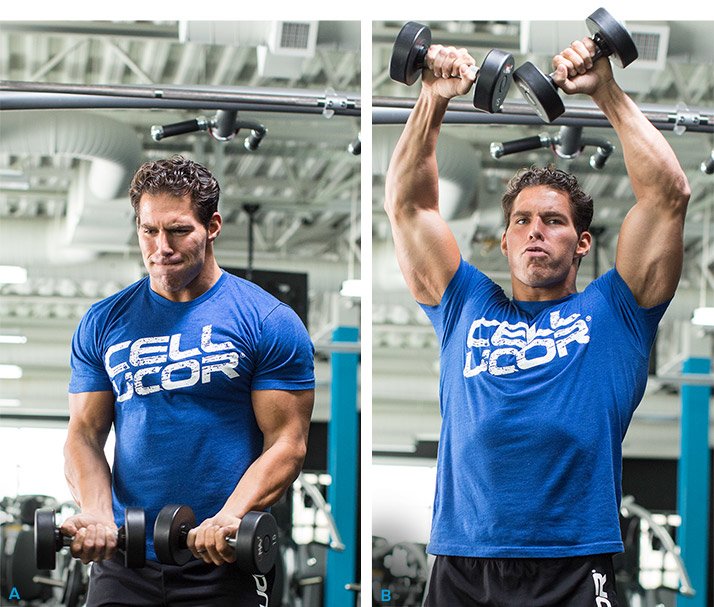
TABATA-STYLE DUMBBELL "C-RAISE"

Back to the middle-delts, but with another twist. Instead of taking the lateral raises to shoulder height, Capurso takes them all the way overhead. By extending the range of motion, he works the middle delts more fully than when he stops at shoulder height.

He also modifies the motion to make it more C-shaped than the arms-extended motion. At the bottom, the dumbbells meet in front of his body with a supinated (palms-up) grip. By the time they reach the top of his head, they have rotated to a pronated (palms-down) position. Be sure to watch the video to see exactly how he does it.

Capurso dumps the straight-sets approach and goes Tabata-style, deepening the muscle burn and pump. Use a weight you can do for about 20 reps, then alternate Tabata-style 20-second work segments with 10 seconds of rest for 4 minutes.

TABATA-STYLE BARBELL HIGH ROW

Capurso calls this last exercise the "willpower gut-check." All you're going to do is pull! Grab a modest dumbbell, and reset your Tabata timer for a barrage of upright rows that'll incinerate the middle delts and upper traps.
Once again, use a weight you can handle for 20 reps, and go for 4 minutes, broken down into 20-second work segments and 10-second rest intervals. If you need to drop the weight around the fifth or sixth set, do it.


At least in the short term, an insane shoulder workout like this is going to cause you some post-workout pain (delayed-onset muscle soreness or DOMS). Adjust your post-workout nutrition and recovery to help battle the pain. But also keep detailed notes about this workout, so you can try to improve on your performance next time around!

The Top 4 Leg-Day Machine Exercises


Free-weight exercises are important. But you can get more out of your leg session by adding machine exercises that will help you meet your physique goals.

It's possible to complete a leg workout without a machine movement, but it's pretty darn hard. If you're working your leg muscles hard, you can get so tired you can hardly stand up. So as you're finishing up leg day, throw in a couple of machine exercises that put your leg muscles under additional stress without you having to worry so much about form or balance. 

Here are my top four leg-day machine exercises.

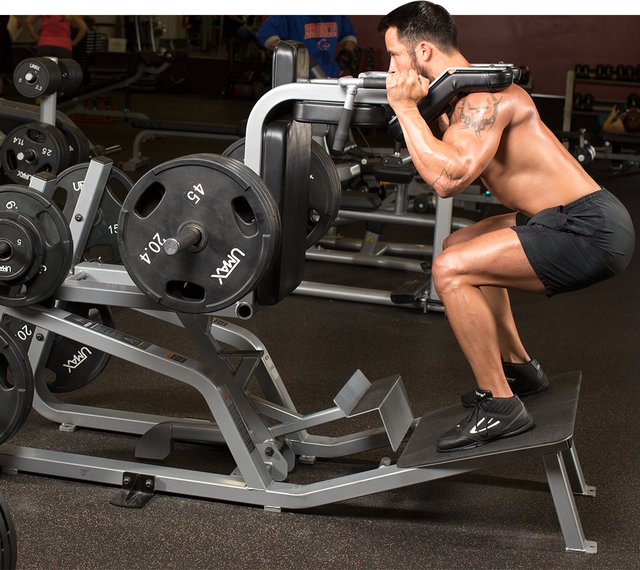
1.Squat Machine


About the Move: Few machines simulate the movement of an actual free-weight squat as well as the squat machine. The squat is one of the best thigh-and-glute builders and should be a staple of every leg routine. If you have a tendency to round your back with the barbell, the squat machine can help you learn proper form. So it's a good way to learn squats, as well as a good, safe way to the end your leg day when your legs are screaming at you to stop. 

Why We Like It: Standard squat machines have an inherent advantage over the Smith machine because the pathway isn't strictly limited to the vertical plane; with the squat machine, you can achieve additional horizontal movement. The shoulder padding also comes in handy, spreading the contact across a larger surface area than a Smith can. 
The larger footplate on the squat machine gives you room to use a number of foot positions to easily shift emphasis from the quads to the glutes and hamstrings. The machine is also good for intensity-boosting techniques. For example:
Paused reps at the bottom of the movement
One-and-a-halfs when you go only halfway down every other rep to get 20 peak contractions for each 10-rep set
Rest-pauses, allowing you to go quickly into and out of the start position. 
Eccentric/isometric machine pause squats 

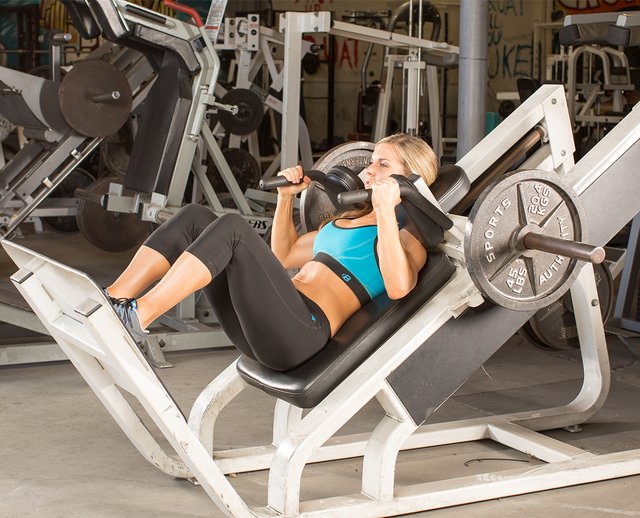
2. Hack Squat


About the Move: The hack-squat machine positions your body about halfway between a standing squat machine and a lying squat machine, supporting your body to protect your lower back. EMG analysis shows that, similar to squats, the hack machine hits your vastus lateralis and vastus intermedius. But the hack does a better job of hitting the inner thigh adductor brevis and magnus.[1] It also provides a greater range of motion around the knee joint.

Why We Like It: Like the squat machine, the hack squat's large footplate offers a wide range of foot positions. This allows you to shift the emphasis from inner to outer thighs, and from the quads to glutes and hamstrings—though the depth of the squat affects emphasis as well.

To complement your full-range training, use 1.25 times your 1RM do half squats over just the top portion of the ROM sets. Do this for 3 sets of 6 to challenge your quads.

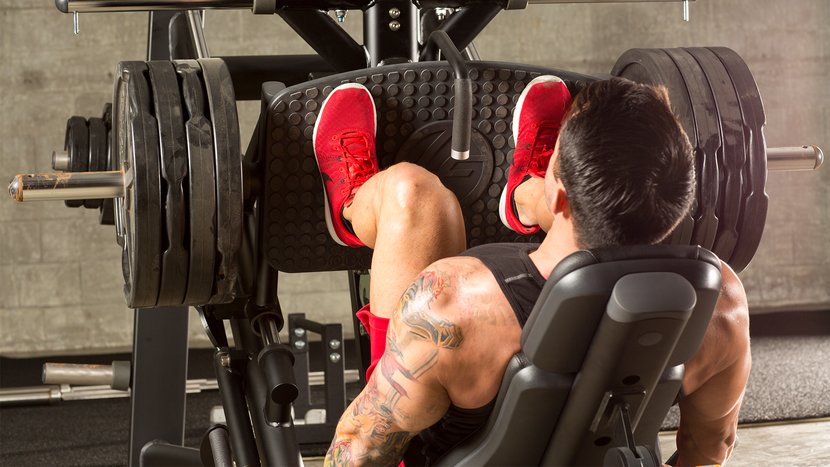
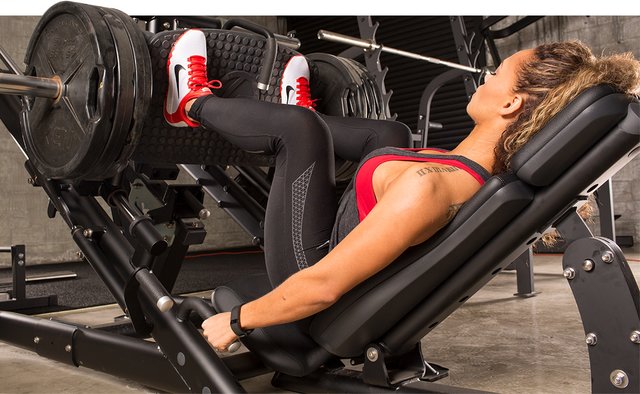
3. Leg Press


About the Move: The leg-press machine is a quad machine. By creating almost a right angle between your torso and legs, the leg press decreases the ROM around your hips, diminishing hamstrings and glute activation and putting the load right on your quads. Using a lower foot placement will increase your quad workout even more. 

Why We Like It: Once again, the machine's large footplate allows you to reposition your feet to adjust muscle-group stimulation. One of my favorite leg-press techniques is best saved for the end of the workout. Your goal is to do 4 dropsets. Start with your 10RM, do 10 reps, then remove about 20 percent of the weight (10 percent if you're more advanced) and do another 10. Keep repeating this until only a single plate remains on each side.

As with all exercises, make sure you do the leg press with the proper form.

4. Butt Blaster


 About the Move: For some lame reason, the butt-blaster machine has been pigeonholed as a "woman's exercise." But men who fall for this miss out on the opportunity to do some major glute work. Unlike the leg press, the butt-blaster machine works through a wide ROM around the hip joint while keeping your knee relatively stable. This helps to focus the movement on your glutes and upper hamstrings.


Why We Like It: It's easy to overload your glutes on the butt blaster, and since you don't have to balance a load, you can push hard to failure. In fact, post-failure techniques like dropsets are super simple to implement on a butt blaster. Try alternating legs without stopping to rest between sets. It'll add intensity and make you happy leg day is almost done.  

Sculpt Sexy, Shapely Arms For Spring!


Sun's out, guns out, ladies! Tame that arm jiggle with the 8 exercises in this triceps-focused workout.

Ready or not, warmer weather is on the way. Making snow angels and bundling up was fun, but it'll soon be time to trade in scarves and Snuggies for tank tops and maxi dresses. If you're feeling less than confident about going sleeveless and showing off extra skin, it could be time to rev up your arm-training routine. After all, you don't want your arms continuing to wave long after you've stopped. 

When it comes to arm training, women, like men, tend to focus on the biceps. Curls are great, but it's important to target the triceps as well. After all, the triceps occupies two-thirds of the upper arm. Anatomically, this muscle comprises three heads, thus the "tri" in triceps. The lateral, medial, and long head of the triceps can all be targeted with different movements and slight variations in grip. Slow, intentional movements and a strong mind-muscle connection help to ensure you're activating and growing each head of the tri-ad.

Additionally, it's easy to neglect the muscles you can't see, or train them at the end of your workout, when reserves are low. As a result, the triceps often don't receive the attention they need. Instead, consider training this significant muscle at the beginning of your session. Better yet, add in an another triceps day during the week to better focus on bringing up that area of the arm and seeing results more quickly.  

In addition to boosting your physique, strong triceps play a major role in push exercises, such as the bench press and bodyweight push-ups. So let's get after it and craft some gorgeous arms you'll be proud of and feel confident showing off! 

Sexy, Shapely Arm Workout


Perform 3-5 sets of 12-15 reps of each of the following exercises. Rest no more than 30 seconds between sets and exercises. Instead of waking up early to slog through fasted cardio, add some fast-paced plyometric movements to your workout. High knees, skipping rope, box jumps, or pop squats in between sets will hasten your body into the fat-burning zone for fast results. 

Bonus: If you're really looking to add more size and shape to this muscle group, consider adding in a second triceps training day, increasing the weight used, and lowering the rep range to 8-12. 
Standing Dumbbell Triceps Extension

Standing Dumbbell Triceps Extension


Target the long head of your triceps with this movement. These can be done with a dumbbell, or you can easily substitute am EZ bar, cable machine, or two separate dumbbells to hit a slightly different angle. 

Directions

1.Seated or standing, grasp a dumbbell with both hands and raise it above your head while keeping your   
   elbows close to your head. 
2.Slowly lower behind your head, bringing your elbows to a 90-degree angle.
3.Pause at the bottom of the movement to maintain tension on the muscle.
4.Extend your elbows to press the weight back overhead.

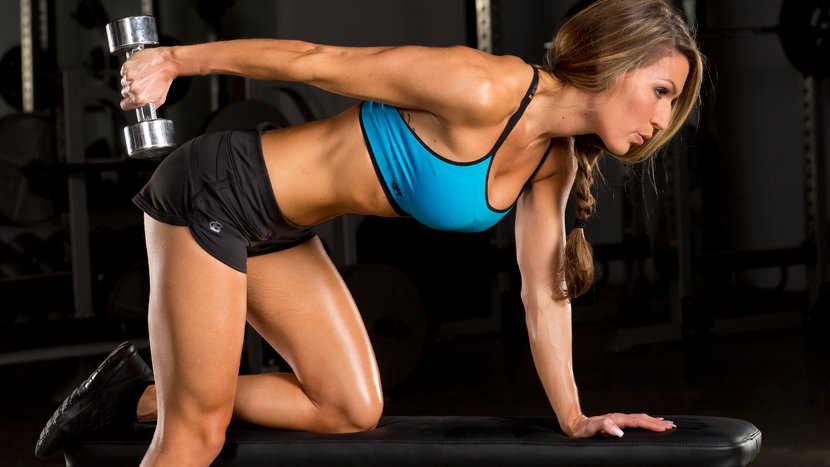
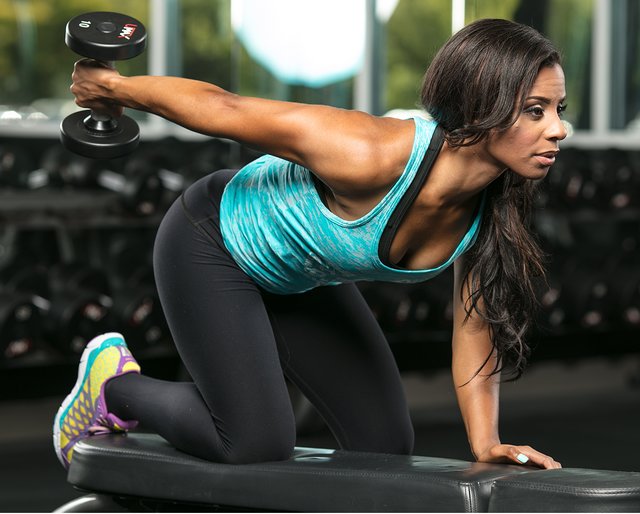
Triceps Kick-Back


This simple yet effective movement engages more of the lateral and long head muscle fibers of the triceps than any other exercise. I like to position myself on an incline bench to prevent any swing and further isolate the triceps. Envision your arms literally pinned to the sides of your body to best target all three heads with this move.


Directions


1.Holding a dumbbell in each hand, bend forward slightly at your waist, keeping your back straight and
    your chest up. Fully extend both arms at once. 
2.Focus on squeezing the triceps at the top of the movement.
3.Slowly return the weights to starting position.

Skullcrusher


This triceps classic targets the long and lateral heads. You can easily adjust the angle to target the muscle differently. For example, you can perform skullcrushers on an incline or decline bench, or use a preacher-curl bar to change hand grip. Regardless, keep your elbows tight to your head to keep focus on the triceps.

Directions


1.Lie flat on a bench with a dumbbell in each hand, arms fully extended. 
2.Slowly lower the weights until your elbows form 90-degree angles.  
3.Press the weights back overhead to full extension.


Bench Dip


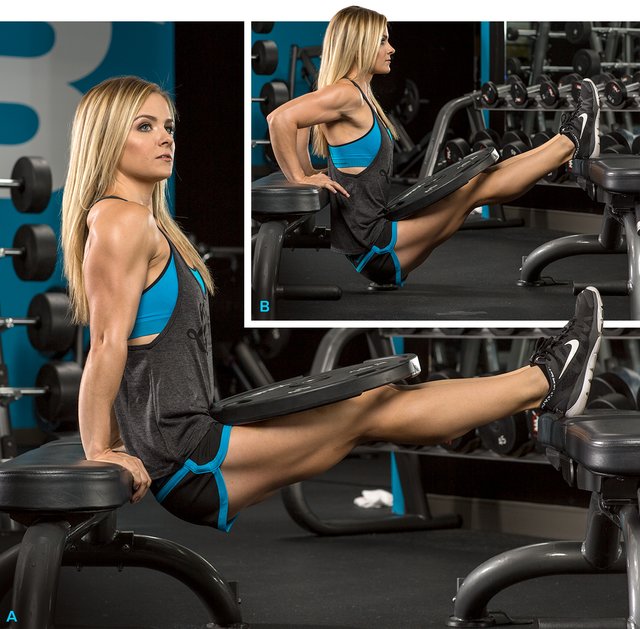
Dip your way to greatness with this exercise targeting the lateral head. This movement can be modified to make it less or more challenging—by adding a weight plate, for instance. This is a great move to use for supersets, since you may already be using the bench for another move.
To add difficulty, straighten your legs in front of you or add a weight plate or dumbbell to your lap.  


Directions


1.Place a bench behind your back. With the bench perpendicular to your body, and while looking away
    from it, hold on to the bench on its edge with your hands fully extended, separated at shoulder width.
    Your legs will be extended forward, bent at the waist and perpendicular to your torso. 
2.Slowly lower your body as you inhale by bending at the elbows until you lower yourself far enough to 
    where there is an angle slightly smaller than 90 degrees between the upper arm and the forearm. 
3.Using your triceps to bring your torso up again, lift yourself back to the starting position.

Triceps Push-Down


Cable rope extensions work the lateral and medial head. I've strategically placed them at this point in the workout. With a simple attachment swap, this makes for an easy transition to your next exercise, the reverse-grip cable push-down. I like to move quickly in the gym! 

Directions


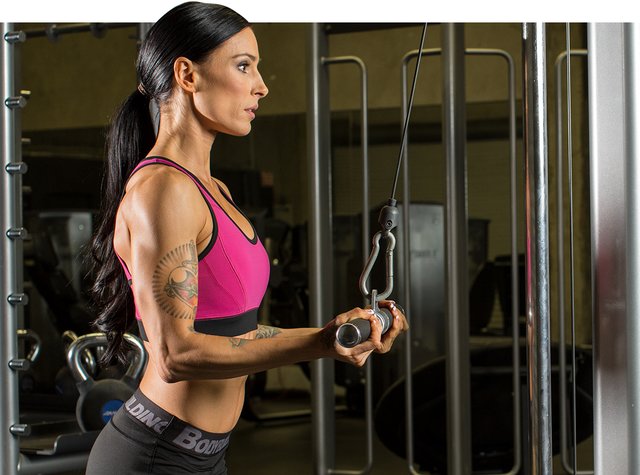
1.Attach a straight or angled bar to a high pulley and grab with an overhand grip (palms facing down) at 
    shoulder width.
2.Standing upright with your torso straight and a very small inclination forward, bring your upper arms
    close to your body and perpendicular to the floor. Your forearms should be pointing up toward the 
    pulley as they hold the bar. 
3.Using your triceps, bring the bar down until it touches the front of your thighs and your arms are fully
    extended perpendicular to the floor. Your upper arms should always remain stationary next to your 
    torso, and only the forearms should move. 
4.After a second hold at the contracted position, bring the bar slowly up to the starting point. 

Reverse-Grip Cable Push-Down


Focus on the medial head with push-downs. They're a great alternative to a basic straight-bar pull-down.  

Directions

1.Start by setting a bar attachment (straight or EZ) on a high pulley machine.
2.Facing the bar attachment, grab it with the palms facing up (supinated grip) at shoulder width. Lower 
    the bar by using your lats until your arms are fully extended by your sides. 
3.Slowly elevate the bar attachment up as you inhale so it is aligned with your chest. Only your forearms
    should move, and your elbows/upper arms should be stationary by your sides at all times.
4.Begin to lower the cable bar back down to the original starting position while exhaling and contracting
    the triceps hard. 

Narrow Push-Up


This movement is a great finisher and requires nothing more than body weight to hit your chest and medial and lateral heads.

Directions


1.Lie on the floor face down and place your hands closer than shoulder width for a close hand position. 
   Make sure that you are holding your torso up at arms' length.
2.Lower yourself until your chest almost touches the floor as you inhale.
3.Using your triceps and some of your pectoral muscles, press your upper body back up to the starting 
   position and squeeze your chest. 

The 6 Grittiest Biceps Exercises You're Not Doing


Whether you use barbells, dumbbells, cables, or machines, your next biceps workout is right here!
article-body-start

Given how much lifters love their arms, you may think that every type of biceps exercise was discovered decades ago. But luckily for you, the quest for new innovation and new ways to stretch sleeves never ends.

Using the same equipment you're using now, you can unlock new growth with just a few simple changes. Get ready to rediscover the joy—and pain—of extended time under tension!

1. Strict Curls And Cheat-Centric Curls


Now, before I tell you the right way to cheat-curl some of the time, I have to tell you why you shouldn't cheat most of the time.


At any given time at any gym, you'll see at least one guy doing heavy biceps curls where he has to throw his lower back or legs into it each time he brings the weight up, while also allowing it to come crashing back down. If you don't see that dude at your gym, it may be because he's you!
When you go too heavy, here's what happens:
You reduce the time under tension because you're forced to use momentum to cheat.
You're unable to lower the weight in a slow, controlled manner, further reducing your time under tension.
You're unable to focus on the muscles being worked because you have to struggle just to get the weight up.
You utilize more muscles, which reduces the accumulated pump in muscles you intend to target—in this case, the biceps.
That said, there was a research study titled "Does cheating pay: the role of externally supplied momentum on muscular force in resistance exercise" that actually made a decent case for cheating!The authors found that "a moderate use of external momentum" can actually increase both the peak muscle activation and the total growth stimulus of a lift.


2. Cable Curl Mechanical Dropset


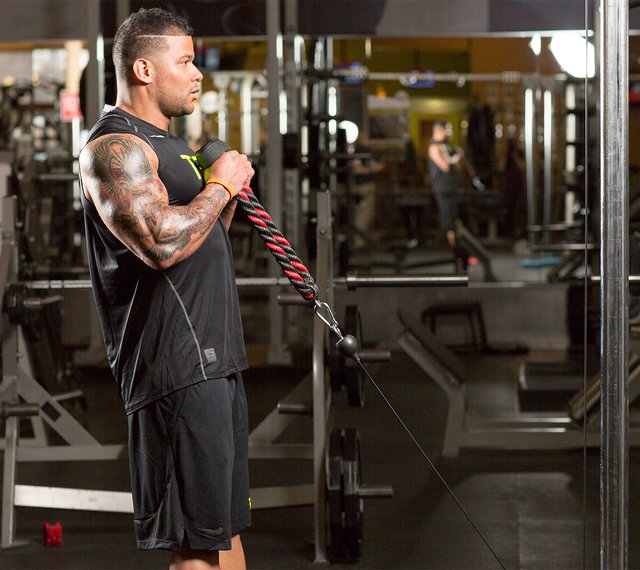
All exercises have a point within the range of motion where the exercise is hardest on the muscle involved, commonly known as the sticking point, and other areas within the ROM in which it’s easier. When you do standing barbell curls, that sticking point is when your elbows reach 90 degrees of flexion (when your forearms are parallel to the floor). If you're doing biceps curls using a cable column, the sticking point changes; it’s instead when your forearm reaches a 90-degree bend with the angle of the cable.

One great thing about the cable stack is that you can actually change the point of maximum difficulty—or the point where the lever arm is longest, mechanically speaking—by simply changing where you stand.


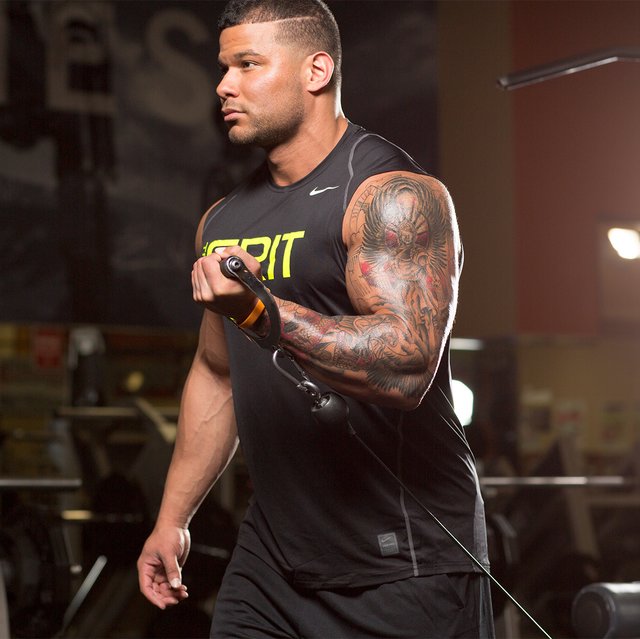
To take advantage of this phenomenon, set the cable at its lowest position, and attach an EZ-bar or straight-bar attachment. Step back until the angle of the cable is roughly 45 degrees, or a pure diagonal line. When you curl at this angle, the point of maximal tension will be closer to the top range of motion, where you're weaker.

Once you can't maintain good technique, step forward so you're standing directly in front of the cable and the cable itself is almost vertical. This will move the point of maximal mechanical tension closer to the mid-range of motion, where you're likely stronger. You'll work more of your biceps in less time and definitely give them a novel stimulus in the process.

Of course, both of these variations also work well as standalone exercises. That said, if you're doing this as a mechanical dropset, try to find a weight load that allows you to perform around 8-10 reps of each version. You may have to adjust the weight load between each variation in order to accomplish that rep range on each.

3. Low Cable Face-Away Biceps Curls


Research has demonstrated that stretching your muscles while they're being activated is one of the most effective ways to stimulate gains in muscle size. That said, aside from preacher curls, most other biceps exercises don't effectively load the biceps from the lengthened position. However, low cable face-away curls get the job done!


Grab one or two cable handles that are positioned low, walk out about a foot in front of the stack, and perform curls while facing away from the cable and keeping your elbows by your sides.

Due to the force vector involved, which I discussed in the previous section, this unique exercise makes the hardest part of the curl the bottom position, where your elbows are fairly straight.

4. Biceps Curl Machine PGE Sets


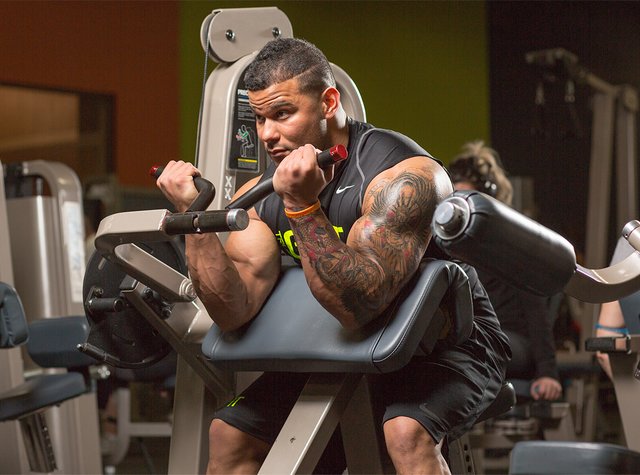
Machines get a bad rap, but in the case of the biceps-curl machine, it's not warranted. In fact, this machine offers one advantage that all free weight and even cable-biceps-curl variations can't match: They are all limited to a single load vector—or a single point of maximum difficulty. When you're not at that point, your biceps are working less. That's precisely why people tend to rest between reps at the top and bottom position when doing barbell or dumbbell curls.


On the other hand, the biceps curl machine is designed with a cam system, which isn't dependent on a single load vector like free weights or cables. Instead, the CAM offers consistent resistance throughout the entire range of motion. This also gives you much more time under tension, because your biceps never get a chance to rest at the bottom or top position.

Sure, you can use a variety of different biceps exercises using free weights and cables to create a maximal force angle at different points in the range of motion. But if you're short on time, or looking to add in a "big bang for your buck" move, the preacher-curl machine is an exercise that hits the muscle from all points of the elbow-flexion range.

5. Thumb-Side Rotating Biceps Curls

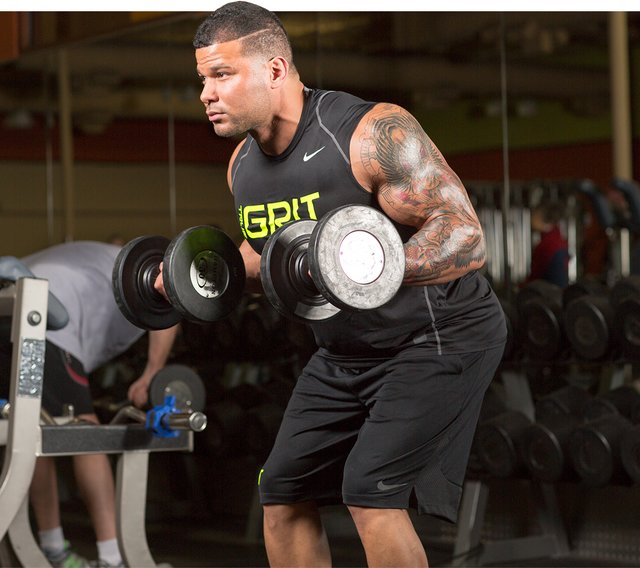
Your biceps don't just flex your elbow; they also are a supinator (outward rotator) of your forearm. So, if we want to achieve maximal biceps recruitment when performing biceps curls with either a dumbbell or cable, we must do so in a manner that involves both elbow flexion and forearm supination. This can be achieved by holding the handle in a unique way, but further emphasized by how you perform the curl.


Instead of gripping the dumbbell from the middle in the traditional manner, grip it all the way to the thumb side with your hand as far to this side as possible.

This small change in hand positioning makes a huge difference, because this grip forces you to resist forearm pronation (inward rotation) while you also use them as elbow flexors to perform the curl.

To further emphasize the effect and use your biceps to their fullest potential, perform the curls this way: Once you hit 90 degrees on the way up, think about touching the bottom (pinky side) of the dumbbell to the front of your shoulder on every rep.

6. Updated Biceps 21s


Biceps 21s are an old-school bodybuilding technique that use partial reps and a long time under tension to overload the muscle. In the classic version, you perform 7 top-range partial reps, 7 low-range partial reps, and 7 full-ROM reps.

These are great, but we can further upgrade them by spending more time in the mid range of motion, where tension is greatest, and by incorporating the biceps' supination function that we just discussed.

New Biceps 21s: Version 1


Perform this protocol using dumbbells, a barbell, or with an EZ-bar.
7 reps: Mid-range partial reps
7 seconds: Isometric hold at 90 degrees, pronating and rotating wrists (dumbbells only)
7 reps: Full ROM

Keywords:

ROM:Range of motion 

More

Featured Post

4 Quick Ways To Make Each Prepped Meal Unique

Total Pageviews